
Firstly, I've noticed I have a few new watchers so hello to you! Please feel free to leave me a comment and let me know who you are, I'd love to pop by your blog for a visit.
My friend, Amanda, invited me to attend a class at Kaisercraft Robina today. It was an epic day, scheduled to run from 9.30 to 2pm with breaks for morning tea and lunch. We ended up crafting from 9.30 to 2.30 with only a break for morning tea. Amanda and I were SO hungry by the end of it but I think it was worth it.
The class was described as a flower frame which would teach you different techniques for flower making. We didn't actually know what the finished product would look like but it sounded like fun.
Turns out the class involved creating a sampler with different flower types in each window of the Kaisercraft 12 card holder frame.

I already knew a lot of these techniques but hadn't actually tried to create some of them so I think it was worthwhile attending. The details were a bit hard to capture given all the petals are white, the background paper is actually a nice light brown to have the flowers pop a bit more. Here is an overview of the flowers and techniques.

First row: (1) Basic crumpled petals flower (not shown in close-up). I've made these heaps of times, though I prefer to spray them with water and scrunch while wet so they hold their shape a bit better. (2) Tim Holtz die-cut with self-embossing and brad. We used a stylus to self-emboss patterns into the petals before layering them. It was handing the see the different looks that could be created depending on which way you bent the petals. (3) Hand-cut rosette and display. I'd seen techniques of how to do this one but hadn't been game to try it myself before this class. Whilst they are quite fiddly, especially waiting for the glue to dry, I think the end result is quite good and I might be tempted to try this one again. (4) Punched circle petals. Another technique I knew but hadn't tried, I think this would look more effective with inked edges or double-sided paper. I had trouble getting the right amount of overlap so it formed a complete circle.
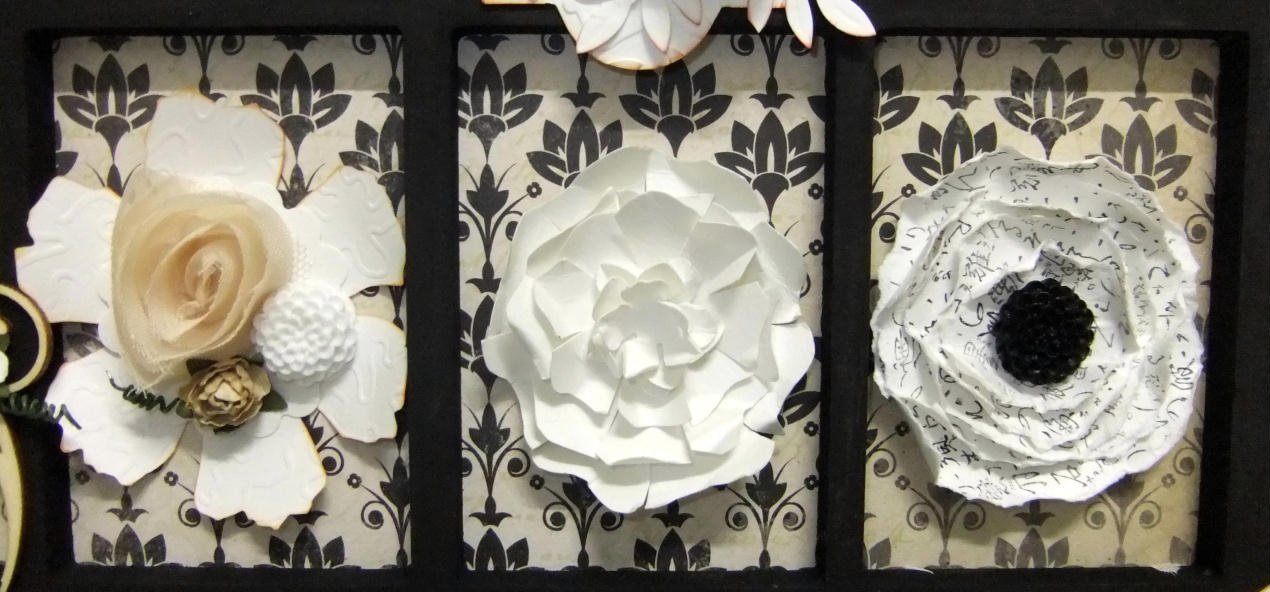
Second row: (1) Florish and mini blooms (not shown in close up). This was just to show how to create trailing vines which I learnt a few months ago and have used on a number of recent LOs. (2) Product sampler. I think this one was just to show-off the Kaisercraft mini-blooms, resin flowers and fabric roses. :) I've been tossing up buying some resin flowers and might go back to get some, I already love the other two products. (3) Scrunched hand-cut petals. We cut three concentric circles, made small cuts to create eight petals and then scrunched them, finished off with three small flowers in the centre. I quite like this effect and it is very easy to create, perfect for creating larger flowers I think. (4) Stamped and shaped. We stamped an Asian script onto five pieces of cardstock, tore them into concentric circles and then shaped the petals around the resin flower centrepiece. Another very easy way to create a flower to perfectly match a LO.

Third row: (1) Organza petals. I love organza/satin flowers however I've never made any of my own. We alternated organza and die-cuts on this flower. I struggled to get a nice shape with my first try which was the biggest piece at the back but I think I got better so I might try making my own in future rather than buying them. (2) Pleated rosette. I knew the theory behind this and had even tried making my own of these but it had failed miserably the first time so I'm very pleased with how this one turned out! (3) Gathered lace. A very simple technique that I once again knew but had never bothered to actually try out. It was much easier and quicker than I had expected and I have heaps of lace at home so I might be making more of these too. (4) Florish and die-cut rossettes (not shown in close up). The teacher wanted us to see the different between die-cut rosettes and hand-cut ones. I don't think there is much difference in the end result so I'll be happy to continue to hand-cut mine if I make future ones rather than fork out the money for a die.
Congratulations if you made it all the way to the end! Thanks for stopping by. :)
Wow, this is beautiful, Lauren!
ReplyDeleteI adore the softneutral colours you've used :)
It certainly looks like it was worthwhile Lauren! Such gorgeous flowers. :)
ReplyDeleteFabulous project - you certainly created up a storm! Just wanted to welcome you to our team at StampaBelles as well!
ReplyDelete